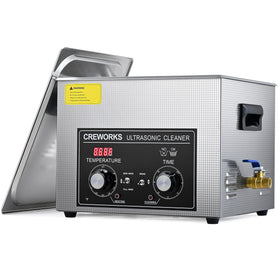
If you’ve ever struggled to clean intricate or heavily soiled items, an ultrasonic cleaner can feel like a game-changer for you. Using high-frequency sound waves to create millions of microscopic bubbles, ultrasonic cleaners lift dirt, oil, and contaminants from surfaces that brushes or cloths can’t reach. With a large tank capacity, it’s ideal for cleaning multiple items or bulkier pieces such as tools, automotive parts, jewelry, and lab instruments. But to get the best results, knowing the right temperature and time settings is just as important as knowing how to operate the machine. In this guide, we’ll walk you through the ideal cleaning settings and a simple step-by-step usage process to help you make the most of your ultrasonic cleaner.
Recommended Temperature and Time Settings
When it comes to ultrasonic cleaning, temperature and time are the two biggest factors influencing your results. The right temperature helps the cleaning solution work more effectively, while the correct duration ensures contaminants are completely removed without damaging your items. In this guide, we’ll use the Creworks 30L Ultrasonic Cleaner as an example. Settings may vary depending on different models, so be sure to read your specific machine’s user manual before operation.
Here’s a quick reference guide:
 Note:
Note:
- Ultrasonic cleaning is NOT recommended for porous items like corals or gemstones like pearls, emeralds, and opals.
- The washing time can be adjusted based on the contamination level of the items, adding the appropriate cleaning solution to achieve the best cleaning effect.
- Choose mild cleaning agents; avoid strong acids/alkalis or corrosive cleaning fluids.
- It is recommended to let the machine run for no more than 30 minutes, followed by a 15-minute rest before continuing.
- During operation, the ultrasonic vibrator will cause the water temperature to rise. It is recommended not to set the temperature above 80 °C/176 °F.
How to Use a 30L Ultrasonic Cleaner: A Step-by-Step Guide

Now that you know the ideal settings, let’s go through the proper way to use your 30L ultrasonic cleaner. The process is simple, but following it correctly ensures you get maximum cleaning power and long-term reliability.
Step 1
Remove the lid from the top of the ultrasonic cleaner. If your device is equipped with a 1/2 in drain valve, close it by turning its handle left completely and connect it to a sink or appropriate facility using a matching hose. Fill the tank with the fluid appropriate for your task (see “Recommended Settings” above), being careful that its level will not exceed the maximum height mark once your items are added.
Step 2
To avoid damage to the tank during use, place the items to be cleaned into it gently. It is highly recommended to use the provided mesh basket to avoid direct contact with the tank. For optimal cleaning effectiveness, do not overlap items. Place the basket in the tank, ensuring your items are fully submerged while the fluid remains below the maximum height mark. If necessary, remove excess fluid appropriately, using the drain valve as described below if your device has one. Replace the lid.
Step 3
Connect the device to a stable, compatible, and well grounded power source using the provided power cord. Do not use a 3-to-2 prong adapter or ungrounded extension cord.
Step 4
Flip the main power switch behind the device to I. The fluid’s current temperature should be displayed on the control panel.
Step 5

Press the ▲ or ▼ above “TIME” to set the length of ultrasonic cleaning up to 30 minutes.
Note:
-
Continuous use longer than 30 minutes is NOT recommended and will shorten this device’s service life. For best results, take a 15 minute rest break after each 30 minute session when prolonged cleaning is needed.
-
When finished with time adjustment, press the power button above “TIME” to activate ultrasonic cleaning at the fluid’s current temperature. The oscillation indicator light should turn on and the remaining time count down in the display area.
Step 6
Press the ▲ or ▼ above “TEMP” to set the working temperature at 0–80 °C. Refer to the following table for Fahrenheit equivalents if needed.

When finished with temperature adjustment, press the power button above “TEMP” to begin heating. The heating indicator light should turn on and your fluid should grow hotter until the set temperature is reached. To end heating, press the power button above “TEMP” again.
Note:
Be aware that this unit DOES NOT automatically deactivate its heating once the target temperature is reached. ALWAYS turn off the heating unit manually when cleaning sensitive objects.
Step 7
The device will stop cleaning automatically at the end of its countdown. Press the power button above “TIME” at any point before that to pause or stop work early. Press it again to resume. (Remember that heating WILL continue until it is separately deactivated.)
Step 8
When finished, flip the main power switch to O and disconnect the device from power.
Step 9
If your device has a drain valve, open it by turning its handle 90° so that it is in line with your hose. Once the tank has fully drained, close the valve again by turning its handle back. Open the lid, remove the basket from the tank, and take out all your items. Rinse any remaining detergent off their surfaces with clean water as needed. If your device has no drain valve, allow time for the heated fluid to cool as needed. Open the lid, remove the basket from the tank, and take out your items. Rinse any remaining detergent off their surfaces with clean water as needed. Hold the device tightly and pour the used fluid into a sink or an appropriate drainage facility. Rinse away any remaining detergent from the surface of the tank with clean water if needed.
Step 10
Use a soft cloth to dry the exterior of your items, the tank, and the basket or allow time for everything to air dry.
Why Choose the Creworks 30L Ultrasonic Cleaner

If you’re looking for a powerful and reliable ultrasonic cleaning solution, the Creworks 30L Ultrasonic Cleaner is a top pick. Designed for both efficiency and ease of use, it brings professional-grade cleaning to your workshop, garage, or home.
-
Powerful Cleaning Performance: Equipped with 600W of ultrasonic power and a 600W heater, it removes grease, rust, and buildup even from hard-to-reach areas.
-
Versatile Applications: Handles everything from delicate jewelry to heavy-duty engine parts, restoring each item to a like-new shine.
-
Easy Digital Control: Set your timer up to 30 minutes and temperature between 20–80°C (68–176°F) effortlessly using its intuitive digital panel.
-
Durable & Safe Construction: Made of 304 stainless steel, this cleaner ensures long-lasting performance and food-grade safety.
Conclusion
Using a 30L ultrasonic cleaner effectively comes down to two things: setting the right temperature and cleaning time. By following the recommended ranges and proper operation steps, you can safely restore many objects from jewelry to engine components to like-new condition. Whether you’re a professional technician, a jeweler, or a DIY enthusiast, mastering these basic settings ensures every cleaning cycle delivers powerful, consistent results.


Leave a comment