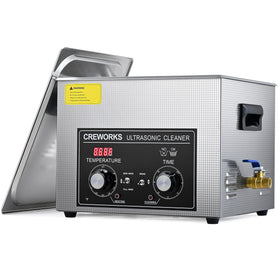
Welcome back to Creworks blog, where we bring you the latest tips and tricks for keeping your living space sparkling clean and organized. Today, we have something truly exciting to share with you - a cost-effective and eco-friendly way to keep your ultrasonic cleaner in action! In this article, we'll explore how to make a homemade cleaner solution for your ultrasonic cleaner, saving you time and money, all while reducing your environmental footprint. Let's dive in!
A Brief Overview About Ultrasonic Cleaners
Before we get into the nitty-gritty of creating your DIY cleaning solution, let's quickly review what ultrasonic cleaners are and why they are such an essential tool for keeping your jewelry, eyeglasses, and more in pristine condition.
Ultrasonic cleaners use high-frequency sound waves to agitate a cleaning solution, generating microscopic bubbles that gently but effectively remove dirt, grime, and contaminants from a variety of items. They're perfect for jewelry, watches, eyeglasses, dental instruments, and even small household items. However, the key to their success lies in the cleaning solution used in the tank.
Creating Your Homemade Ultrasonic Cleaner Solution
Now, let's get to the exciting part – making your own cleaning solution. Not only is this cost-effective, but it also gives you control over the ingredients, ensuring that your precious items are cleaned without the use of harsh chemicals. Here's what you'll need:
Ingredients:
- Distilled water
- White vinegar
- Dish soap
- A splash of rubbing alcohol
Instructions
- Start with a clean ultrasonic cleaner tank.
- Fill the tank with distilled water, ensuring that your items are fully submerged.
- Add 1/4 cup of white vinegar to the water. The vinegar helps break down dirt and grime.
- Add a few drops of dish soap. This will help with the overall cleaning process.
- For a little extra cleaning power, add a small splash of rubbing alcohol to the solution.
- Place your items in the tank and turn on your ultrasonic cleaner. Let it run for the recommended time, usually 3-5 minutes.
- Rinse your items with clean water and pat them dry.
Benefits of a Homemade Solution
Creating your homemade ultrasonic cleaner solution comes with several advantages:
- Cost-Effective: It's much more affordable than purchasing commercial cleaning solutions.
- Eco-Friendly: You have control over the ingredients, reducing your environmental footprint.
- Customizable: Adjust the solution to cater to specific cleaning needs.
By creating your own homemade cleaner solution for your ultrasonic cleaner, you not only save money but also contribute to a cleaner and greener planet. Give it a try, and your jewelry, eyeglasses, and small household items will thank you for the gentle yet effective cleaning. Don't forget to share your results with us and keep exploring our blog for more exciting home improvement tips!
Frequently Asked Questions (FAQ)
Q1: Can I use tap water instead of distilled water for the DIY ultrasonic cleaner solution?
While you can use tap water, it is not ideal. Tap water contains minerals that may leave residue, reduce the cleaning efficiency of your ultrasonic unit, and potentially lead to buildup in the tank over time. Using distilled water helps avoid those issues and aligns with the eco-friendly intent of the recipe.
Q2: Is the homemade solution safe for all items like jewelry, eyeglasses and small tools?
In most cases yes. However, caution is recommended: check whether any specific material (e.g., soft gemstones or delicate coatings) might react poorly to vinegar or alcohol before cleaning.
Q3: How often should I change the DIY cleaning solution in the ultrasonic tank?
You should replace the solution whenever it becomes visibly cloudy, has an unusual smell, or you notice diminished cleaning performance. Regular replacement maintains the eco-friendly solution’s effectiveness and prevents settling of debris.
Q4: Can I add other ingredients to boost cleaning power?
Yes—but with caution. For tougher grease or grime, some users incorporate small amounts of baking soda, citric acid or other mild additives. However, harsher chemicals, strong acids or solvents should be avoided because they could damage items, degrade the tank or counteract the eco-friendly goal.
Q5: Are there items I should not clean with this DIY solution?
Yes. Although the recipe works for many metals, glass or plastics, you should avoid it (or any ultrasonic cleaning) for items like soft gems, delicate coatings, electronics not rated for ultrasonic cleaning, or materials that specify “no vinegar” or “no alcohol”. Always test a small area and verify compatibility.
My name is Michael Anderson, and I am a senior engineer specializing in heavy machinery and equipment. I hold a degree in mechanical engineering and have extensive experience in mining and construction industries worldwide. My aim is to simplify complex technical concepts, making them accessible and understandable to a wide audience.


Leave a comment