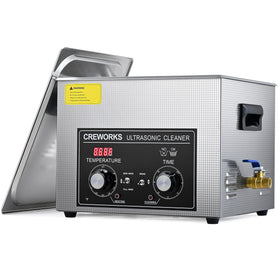
Welcome back to Creworks blog, where we bring you the latest tips and tricks for keeping your living space sparkling clean and organized. Today, we have something truly exciting to share with you - a cost-effective and eco-friendly way to keep your ultrasonic cleaner in action! In this article, we'll explore how to make a homemade cleaner solution for your ultrasonic cleaner, saving you time and money, all while reducing your environmental footprint. Let's dive in!
Ultrasonic cleaning is a process that uses ultrasound and an appropriate cleaning solvent to clean delicate items. It's a preferred method for cleaning intricate parts, jewelry, and other items that require a gentle touch. While commercial ultrasonic cleaning solutions are readily available, you can also create effective homemade solutions for specific cleaning needs. In this blog, we will explore various recipes for ultrasonic cleaner solutions suitable for different types of items.
Basic General-Purpose Cleaning Solution
Ingredients:
- 2-3 tablespoons of mild dish soap
- 1 liter of warm water
Instructions:
- Mix the dish soap with the warm water in a container.
- Pour the solution into the ultrasonic cleaner.
- Place your items in the cleaner and run the machine.
This solution is great for general cleaning tasks, including most metals and plastics. Avoid using it on items that are sensitive to soap or water.
Enhanced Solution for Grease and Oil Removal
Ingredients:
- 1 part ammonia
- 2 parts dish soap
- 6 parts water
Instructions:
- Combine the ammonia, dish soap, and water in a container.
- Pour the mixture into the ultrasonic cleaner.
- Place the items to be cleaned in the cleaner and run the machine.
This solution is particularly effective for items with heavy grease or oil build-up. Use it with caution and ensure good ventilation due to the ammonia.
Gentle Cleaning Solution for Jewelry
Ingredients:
- 2 tablespoons of dish soap
- 2 tablespoons of ammonia
- 3 tablespoons of baking soda
- 1 liter of warm water
Instructions:
- Dissolve the baking soda in warm water in a container.
- Add dish soap and ammonia to the solution.
- Pour the mixture into the ultrasonic cleaner.
- Place your jewelry in the cleaner and run the machine.
This recipe is ideal for cleaning jewelry, including gold and silver. However, it's not recommended for soft or porous stones.
Strong Cleaning Solution for Metal Parts
Ingredients:
- 1-2 teaspoons of citric acid powder
- 1 liter of water
Instructions:
- Dissolve the citric acid powder in water.
- Pour the solution into the ultrasonic cleaner.
- Place the metal parts in the cleaner and run the machine.
This solution works well for metal parts, especially for removing rust or tarnish. Avoid using it on metals that react with acids, like aluminum.
Eco-Friendly Cleaning Solution
Ingredients:
- 4 parts water
- 1 part white vinegar
Instructions:
- Mix the water and white vinegar in a container.
- Pour the solution into the ultrasonic cleaner.
- Place the items in the cleaner and run the machine.
This solution is an environmentally friendly option for general cleaning. It's particularly effective on glass and stainless steel.
Tips for Successful Ultrasonic Cleaning
- Always check the compatibility of the solution with the item being cleaned.
- Use warm water to enhance the cleaning action.
- Change the solution after every cleaning session to maintain effectiveness.
- Rinse items thoroughly with clean water after cleaning.
Conclusion
Creating your own ultrasonic cleaner solution can be both cost-effective and efficient. Depending on the items you need to clean, these recipes can be easily adapted. Remember, the key is to understand the material of the items being cleaned and choose the ingredients accordingly. With these DIY solutions, you can ensure your ultrasonic cleaner is always ready for action!
FAQ
What can I clean with an ultrasonic cleaner?
You can safely clean many items such as jewelry, eyeglasses, small mechanical parts, and auto components. For each item, follow the material guidelines and use the recommended cleaning solution and cycle duration to avoid damage. If in doubt, test on a small, inconspicuous area first.
Can I use household cleaning liquids?
Yes, you can use mild dish soap or manufacturer-recommended ultrasonic cleaning solutions. Avoid strong acid, base, or chlorine-containing liquids, as they may harm some materials. Check your cleaning solution’s compatibility with your items.
How should I handle cleaning solution concentration and changes?
In most cases, keep the liquid surface covered by about half the depth of the tank. Follow the solution’s own instructions for concentration. If the solution looks cloudy, smells off, or changes color after several uses, replace it to maintain effective cleaning.
Which materials should I avoid cleaning with ultrasound?
Some gemstones, brittle materials, thin coatings, and certain plastics may be damaged by ultrasonic cleaning. Refer to the device’s compatibility chart and your brand’s listed exclusions for each material.
How can I prevent excessive foaming or overflow?
Ensure the liquid level is appropriate, place items to avoid crowding, and do not overload the tank. If foam or overflow occurs, reduce the loading or clean in batches.
What should I do after cleaning?
Rinse items with clean water to remove any residue, then dry with a lint-free cloth or air dry. Avoid rapid drying in high heat to prevent stress on materials.
How to maintain the cleaner?
Clean the exterior and tank walls regularly, use the recommended cleaning solution, and keep transducers and heating elements dust-free. Avoid running the unit dry for extended periods; if there’s a fault indicator, consult the troubleshooting guide or support.
What specifications matter when buying?
Look for tank capacity, output power, frequency, temperature control range, heating capacity, tank material, whether it has timers or automation, and compatible cleaning liquids. If there’s a specific model, we can compare exact specs side-by-side.
How to choose a cleaning solution or brand?
Prefer solutions recommended by the equipment manufacturer to ensure compatibility. Compare brands on gentleness, cleaning strength, foam behavior, and material protection.
My name is Michael Anderson, and I am a senior engineer specializing in heavy machinery and equipment. I hold a degree in mechanical engineering and have extensive experience in mining and construction industries worldwide. My aim is to simplify complex technical concepts, making them accessible and understandable to a wide audience.


Leave a comment